 StreamLive Pro
Scenes and layers in the browser studio: build a scene
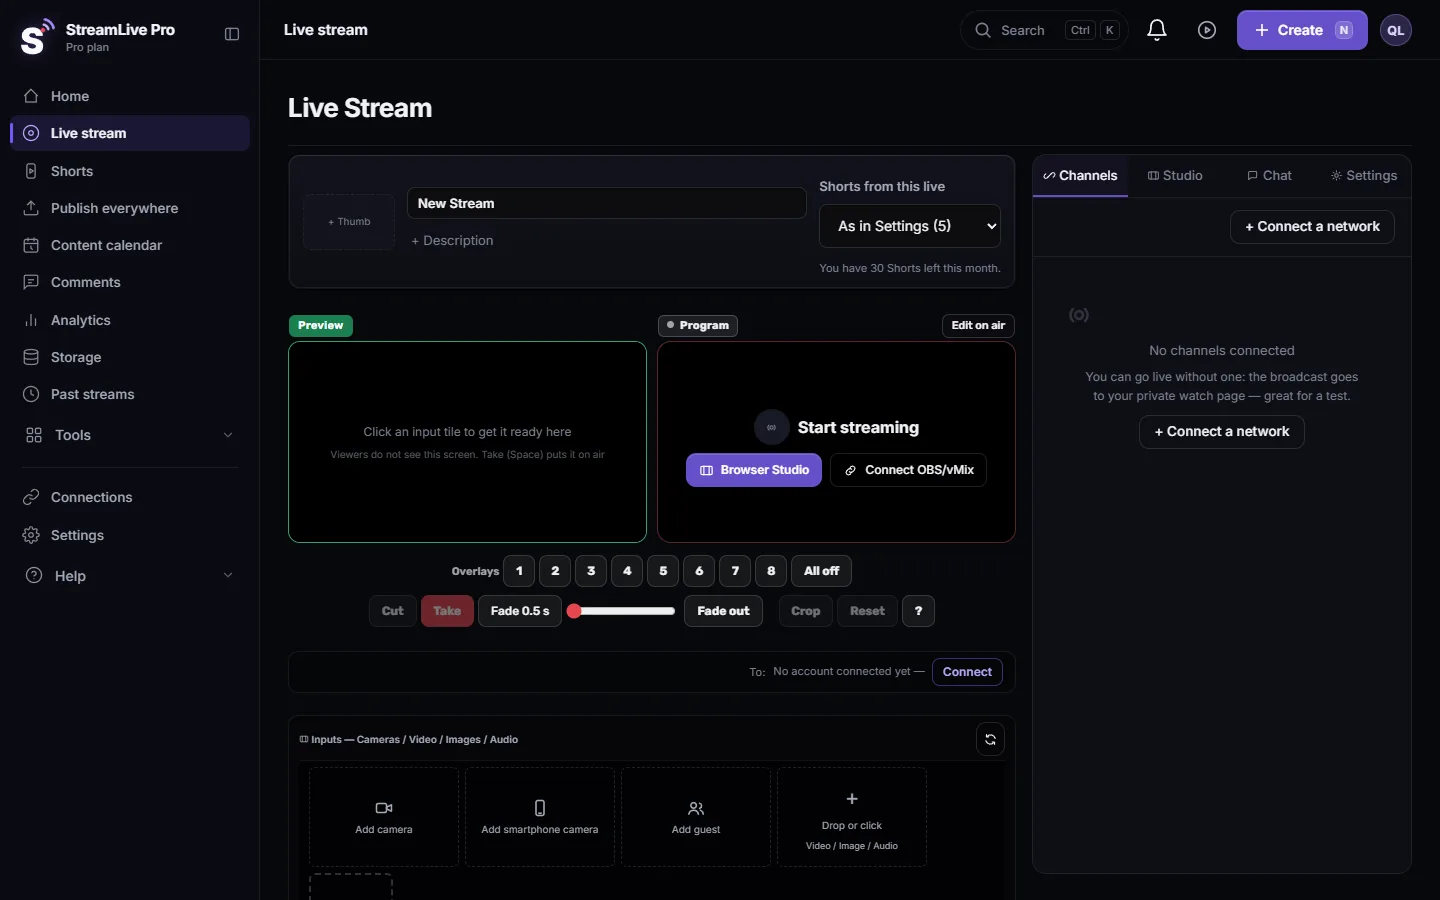
The browser studio has no Scenes list like OBS. Build a scene as an input with up to 10 layers, switch it with Preview and Take, and add overlays on top.
The browser studio has no "Scenes" list like the one in OBS. A scene is built from an input: any input can hold up to 10 layers (other inputs, pictures or videos), stacked 1 at the bottom to 10 on top, and the whole composition goes on air together with that input. You switch between scenes the same way you switch between inputs: put one in Preview, then Take or Cut. Logos, lower thirds and anything that should stay on top of every scene go on the overlay channels 1 to 8, above Program.
How OBS words map to the browser studio
| In OBS or vMix | In the browser studio |
|---|---|
| Scene | An input with layers. Often a Blank input with layers on it |
| Sources inside a scene | The 10 layers inside the input (Layers tab of its settings) |
| Source order | Layer number: 1 is drawn at the bottom, 10 on top |
| Switching scenes | Preview, then Take (with the transition) or Cut (at once) |
| Something shown on every scene | An overlay channel, 1 to 8, drawn above Program: Overlay channels 1 to 8 and their keys (F1 to F8) |
| Scene collection | Not available. Workspaces only change the screen layout, not what goes on air |
In OBS a scene collection saves all scenes and their sources, as OBS describes in its own help: OBS help: Scene Collections (checked 5 November 2026). Preview and Program in the browser studio: Preview, Program, Take and Cut explained.
Before you start
- The browser studio: Live stream and then Browser Studio, or Podcast. Layers and overlay channels work in both.
- The parts of the scene added as inputs: cameras, pictures, videos, slides or a screen share. Cameras: Add a camera to the browser studio. Pictures and videos: Show an image on screen during a live stream and Play a video file during a live stream.
Steps
- Add a base for the scene. In the inputs strip, add Blank. It is a black 1920x1080 input and the studio says "Blank input added - stack layers on top". You can also use a camera or a picture as the base.
- Open the base input's settings. Click the gear on its tile, or double-click the tile, and open the Layers tab.
- Fill the layers. The tab is titled Layers inside this input and has 10 numbered rows. In each row choose a source from the list. Every other picture input of the studio is offered; an input never appears inside itself. The box at the start of the row shows or hides that layer.
- Add a file straight from the computer if you need one. Add layer from computer, Image or Video: the file becomes a new input and lands in the first free layer ("Added to layer N").
- Place each layer. Position on the row opens Edit Layer with X, Y, Width and Height in percent of the frame. The Layout buttons (Full, PiP, 2-Up, 4-Grid) arrange layers 1 to 4 in one click.
- Choose where the input's own picture sits. This input's own picture: Under every layer (as in vMix), Above layer 1 to 9, or Above every layer. A new composition starts with the input's own picture at the bottom. For a camera in front of a background, set it to Above every layer.
- Check the result. The composition shows on the input's tile, in Preview and in the Large view of the tile. Nothing goes on air while you build it.
- Put the scene on air. Click the tile to put it in Preview, then Take or Cut. Build the next scene the same way and switch between them with Preview and Take.
A wrong change in an input's settings can be undone with Ctrl+Z (Cmd+Z on a Mac) while you are in the studio. Switching itself is never undone.
Three common scenes
| Scene | How to build it |
|---|---|
| Presenter over slides | Base: the slides input. Layer 1: the camera, placed small in a corner with Position. Own picture under every layer |
| Keyed person over a video set | Base: the green-screen camera, keyed with Remove green screen or the Colour Key tab. Layer 1: the video input. Own picture above every layer |
| Two speakers side by side | Base: Blank. Layers 1 and 2: the two cameras, then Layout 2-Up, or Edit Layer for each |
Green screen steps: Green screen in the browser studio, step by step. Every tab of the settings window: Input settings in the browser studio, tab by tab.
Layers inside an input or overlay channels
- Layers inside an input belong to that scene. They go on and off air with the input, so switching scenes changes them too.
- Overlay channels 1 to 8 sit above whatever is on Program and stay there when you switch. Use them for a logo, a lower third or a ticker. Higher numbers are drawn above lower ones. Turn a channel on with the number on a tile, or Shift and the number on the keyboard.
What can go wrong
- The camera disappears behind the background. The input's own picture is under the layers. Set This input's own picture to Above every layer.
- A source is missing from a layer's list. Sound-only inputs are not offered, and an input is never offered inside itself.
- Black behind a keyed person. Nothing is under the person. Add the background as a layer and put the input's own picture above it.
- I changed a layer and the viewers saw nothing. The layers go on air only with the input. Take the input to Program, or edit it while it is in Preview first.
- The computer gets slow with many layers. Every layer is drawn again for every frame. Hide layers you do not use and see The live studio is slow and my computer is struggling.
Frequently asked questions
Does the browser studio have scenes like OBS?
There is no Scenes list. You build a scene as an input with up to 10 layers and switch it with Preview and Take, like any other input.
How many layers can one input hold?
Ten, numbered 1 at the bottom to 10 on top, plus the input's own picture, which you can place under, between or above them.
How do I keep a logo on every scene?
Put the logo on an overlay channel. Overlay channels stay above Program when you switch inputs.
Can I put a video behind a green screen?
Yes. Key the camera, add the video input as a layer of the camera, and set the camera's own picture to Above every layer.
Can I save my scenes for the next broadcast?
There is no scene collection to save or load. After a reload the studio offers to restore itself in the same browser, but files have to be picked again.
Keep reading
Bring an OBS or vMix scene into the browser studio as a camera: start the virtual camera, pick it in Add camera, add its sound, and fix a black or missing virtual camera.
Live stream checklist: before, during and afterA printable live stream checklist: test broadcasts, stream keys, sound check, backup internet, what to do if the stream drops, and the work after it ends.
PTZ cameras for live streaming: protocols and setupWhat a PTZ camera is, VISCA, Panasonic, ONVIF and NDI control, HDMI vs SDI vs NDI delay, presets for a lecture or service, zoom by room depth, PoE.
Upload speed and bitrate for multistreamingYouTube's bitrate table for 720p to 4K, the upload you need to multistream from OBS vs a relay, CBR and 2-second keyframes, and how to test your connection.
Want to try it? 7-day trial, no credit card.
Start free