 StreamLive Pro
Add a camera to the browser studio
Add a camera to the browser studio: pick a webcam, capture card or virtual camera, choose its microphone, and set focus, exposure and mirror on the tile.
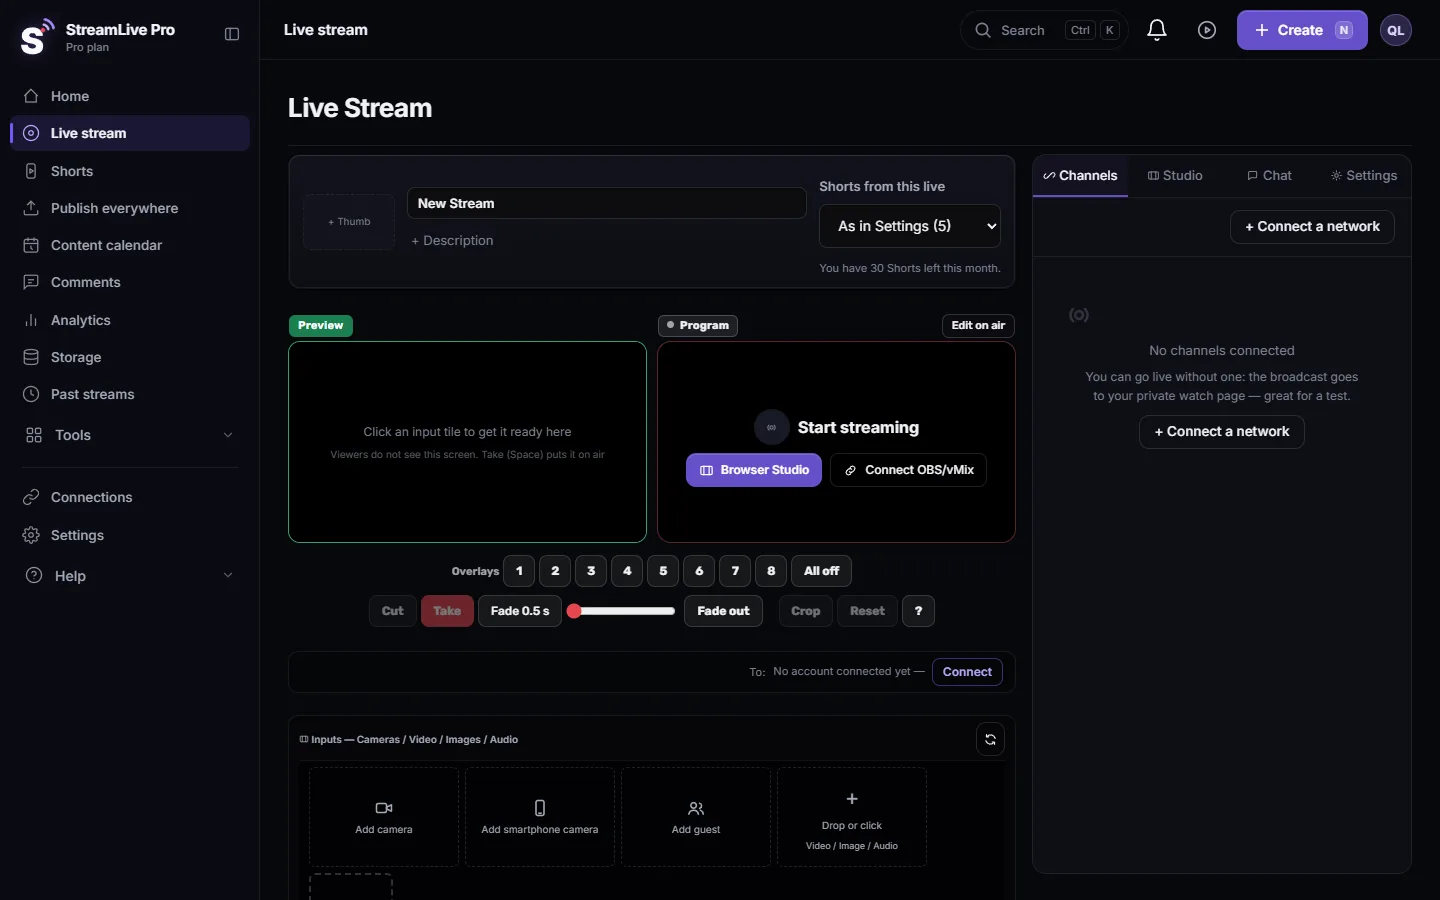
To add a camera to the browser studio, open Add input in the bar under the picture and press Camera, or click the Add camera tile in the inputs strip. A window lists every camera and microphone the browser can see. Pick one of each, press Add, and the camera becomes a tile you can put on Preview and take to air. Each camera you add is another tile, so a second or third angle takes the same few clicks.
Before you start
- The studio is open. Choose Live stream, start a new live and pick Browser Studio. Allow the camera and microphone when the browser asks.
- The camera is connected and free. A USB webcam, a camera through a capture card, or a virtual camera from other software (NDI, vMix or OBS virtual cameras). Close Zoom, Teams and any other tab that holds the camera.
- Any plan, including the trial. Cameras are part of the browser studio. Automatic switching between cameras (Active Speaker) depends on the plan; see /pricing?lang=en.
Steps
- Open the camera window. In the bar under the picture open Add input (camera, screen, file, playlist) and press Camera. The Add camera tile in the inputs strip opens the same window.
- Read the count. The window Add Camera to Studio says how many cameras and microphones it found. Browsers hide device names until you have allowed the camera once, so the studio asks for permission first; that is why the names are real and not "Camera 1, 2, 3".
- Pick the camera. Choose it in the Camera list. Capture devices and virtual cameras are marked so they are easy to spot in a long list.
- Pick its microphone. In the Microphone list choose the microphone that belongs to this camera, or No microphone if you use a separate one. Each camera's sound gets its own volume on the tile.
- Plugged it in just now? Press Refresh. The window reads the devices again and shows the new camera.
- Press Add. You see Camera added to studio. NDI, vMix, OBS and capture devices can take a few seconds to deliver the first picture; the message then says the studio is waiting for the source, up to 5 seconds.
- Put it on air. Click the tile to put it on Preview, check the picture, then press Take or Cut: Preview, Program, Take and Cut explained.
Set up the picture
Open the camera's settings with the gear on its tile.
| Tab | What you set |
|---|---|
| Camera Pro | Focus mode and distance, exposure mode and shutter, exposure compensation, white balance and colour temperature, zoom, pan and tilt. These are hardware controls, shown only on cameras that support them |
| Camera Pro (software) | Brightness, contrast, saturation, digital zoom and a quick rotation if the picture is upside down |
| General | Name, Mirror, the Pro Look presets (Auto Pro, Cinematic, Broadcast, Vivid) and the virtual background: Virtual background and background blur in a live |
| Colour Key | Green or blue screen: How to set up a green screen virtual studio for live streams |
| Position | Size, place and crop, for a camera in a corner: Side by side and picture in picture layouts in a live |
Lock exposure and white balance by hand when the light in the room does not change. A camera that adjusts itself can make faces pulse brighter and darker during the live.
Other kinds of camera
- A phone: Use your phone as an extra camera.
- A camcorder or DSLR through a USB capture card: the card shows up in the browser like a webcam, so it is picked in the same window as a webcam.
- Several cameras and how to plan them: How to live stream with several cameras.
What can go wrong
- No cameras found. The browser sees none: the camera is unplugged, blocked, or in use by another program. Full checklist: My camera does not work in the browser.
- The tile says Camera disconnected. The cable moved or the device went to sleep. Press Reconnect on the tile. If the camera was on air, the tile says so, so you know viewers see a frozen or empty picture.
- The camera's picture is black for a few seconds. Normal for NDI, vMix, OBS and capture devices. Wait up to 5 seconds before trying again.
- Two cameras on one USB hub stutter. Each USB camera needs its own share of USB bandwidth. Move one to another port on the computer itself.
- After a reload the cameras are back but a file is missing. The studio is remembered in this browser: cameras come back by themselves, while files have to be picked again.
Before every live, run The 10-second camera check before you go live.
Frequently asked questions
How many cameras can I add to the browser studio?
As many as your computer and its USB ports can handle. Each camera is another tile, and the studio still sends one stream to every network.
Can I use a camcorder or a DSLR?
Yes, through a capture card that turns its HDMI output into a USB camera. It then appears in the same camera list as a webcam.
Can I use an NDI or OBS virtual camera?
Yes. Virtual cameras appear in the camera list and are marked there. Their first picture can take up to 5 seconds.
Does a second camera need more upload speed?
No. Switching happens in your browser, and the studio sends one stream. Our servers send it on to every network.
Why are there no focus or zoom controls for my camera?
Those controls come from the camera itself. The studio shows them only when the camera reports them to the browser; many webcams do not.
Keep reading
Go live from a Mac with nothing to install: the browser studio in Safari or Chrome, the macOS permissions to allow, and when an app is still better.
Resolution and frame rate for live streamingResolution and frame rate for live streaming in plain words: 720p or 1080p, 30 or 60 fps, how both drive bitrate, and how to set them in StreamLive Pro and OBS.
How to live stream a panel discussionHow to live stream a panel discussion with remote speakers: invites, layouts for three to five people, a moderator's run sheet, audience questions on screen, and Shorts.
How to live stream a cooking show with two camerasHow to live stream a cooking show with two cameras: a phone overhead on the pan, the cook's face, picture in picture, sound in a noisy kitchen, and Shorts of each recipe.
Want to try it? 7-day trial, no credit card.
Start free